Upgraded Message System

So the problem I was having with the old message system was that I couldn’t have more than one line of dialogue. I couldn’t have little images of characters beside the text if I wanted too. I had to do a major overhaul of the message system as a whole to get it to where I wanted it.

So the way it used to work was that it would display a line of text when I wanted it to and I could write the text as a string in code. This proved to be a problem later on when I wanted more than one message box after another.

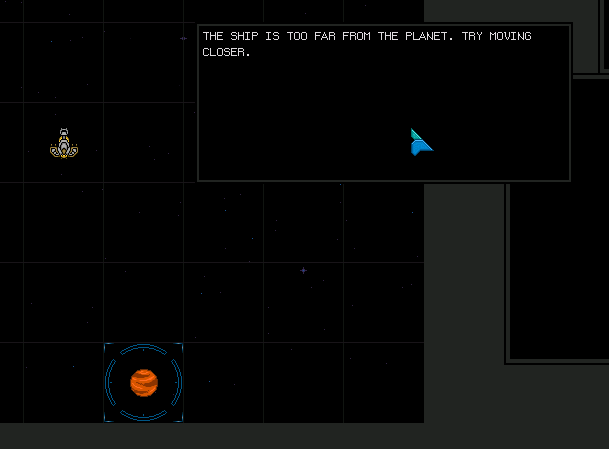
I wanted a way for the player to read multiple lines of text. The message system would pause in between lines and wait for the user to input an enter or mouse click or something like that; before it would continue.

After all the lines have been read, the game would resume. I also wanted to use what I already created for the message system so far because I already have it wrapping words and stuff so it would seem a waste to redesign that. It wasn’t too hard to extend what I already had into a multi-line system.

I started by creating a new game state called, GAMESTATEMESSAGE, and redesigned the message system to have a current line variable that tracked what line the player was reading and a method for skipping the message forward. The class also changes the game state back to the previous state when all the messages have been read.

Now when the game needs to show the player a message it will call a “group” of messages that are linked to an id and display them one at a time after the player clicks the mouse or presses enter.

I also had to create another class called the MessageHandler which basically displays the message group based on which ID was being called at that time. It also has a list of all message IDs that are used in the game and are listed by name making it easier to program. It’s working well so far.


Remelic

Upgraded Message System

Warping Around the Galaxy

Obviously warping is going to be a very important part of our game. Since it is done quite often I want it to have some kind of visual queues for the player so its not just an instant flip of the screen and they are there. It has to be simple but still epic and ultimately have something to do with the game-play.

In the original game when a player decided they wanted to move to another quadrant they would set their warp speed and their coordinates in the form of (Quadrant-X, Quadrant-Y, Sector-X, Sector-Y). When they hit enter the view-screen would change showing the warping star effect everyone is familiar with. The time it took to get there depended on how far you were and what the warp speed was set at. The computer also calculated weather or not you had enough energy to complete the journey at the desired warp setting. If your ship did not have enough energy in the warp engines than you were warned about the lack of energy and you had to make adjustments to your energy or warp speed to be able to warp. You could always warp at the lowest warp setting if you had no choice so you could never get stuck without a way to travel.

Seems like a logical place to start. So in my game I want to keep the same sequence of actions when the player clicks on a quadrant to warp too.

  1. When they click on a quadrant we find the distance from our current quadrant.
  2. The energy required is calculated by distance multiplied by warp speed.
  3. If there is enough energy the time required is calculated by distance divided by warp speed.
  4. The players ship will complete a warping away animation.
  5. The current sector view fades away and the star-field will start a warp cycle for the duration of time.
  6. The next sector will than “warp” into their grid positions (the sprites will scale into position from the center outward).
  7. The star-field will then resume its drift cycle (stars slowly drift downward).
  8. The player’s ship will immediately appear in an available position with a reverse warp animation.

The star-field will continue warping for a duration of time to give the impression of distance traveled. Instead of making the timing the same every time it will also give the player a reason for having a higher warp speed setting.

Warp Cycle Sequence
Warp Cycle Sequence

When the star-field is finished, the game will quickly load the next sector but it will be very small in the center of the grid. It will also be set to transparent so the player will not see it initially. The sector objects will then fade into view while scaling into position on the grid making it feel like the player has finally arrived before their ship warps back into view in an empty space.

Since the distances can be around 7 quadrants and our warp speed can be set to 9 that makes the time, in days, required to be, 7 / 9 = 0.777 * 10… or 8 when we round up to the nearest integer; the energy required will be a maximum of, 7 * 9 = 63 units. Using this formula we can determine some other variable limits. Now we know that our player ship’s warp engines needs somewhere around 70-100 units of energy. The duration of our star-field can be the time multiplied by 2 seconds (time x 120 for game cycles at 60-fps).

If it takes 8 days to travel to another sector then the star-field will take 16 seconds to complete before the player will reach their destination. If it takes 23 days then it will take 46 seconds to travel where the player may experience a number of mishaps along the way. The greater the distance of travel, the greater the chances of something happening. I realize that a 70 second duration is a long time to wait but that is part of the game-play mechanic. A player is discouraged from warping great distances at low warp or they will basically be cruising through space for a while.


Remelic

Warping Around the Galaxy

Hybrid Behavior Trees

When I began thinking about how I wanted to handle the AI for this game I was interested in behavior trees at first until I had a realization. The game I am making is not a real-time game and a behavior tree isn’t really the best approach to this type of game. It can apply for part of the decision process but a decision tree is a better approach in this case.

Drack AI Decision Tree
Drack AI Decision Tree (Partial)

So this is basically how the Drack react when the player suddenly appears in their sector. The only part of the AI that is based on a behavior tree is the first node that acts like a selector. This helps serve as the objectives branch of the tree. The tree above is showing only one branch of the initial selector but there are many more after it.

The Drack are planet harvesters and their primary goal will be to destroy planets that are nearby. All other goals are less relevant. They only react to changes in their short-range scanners, like when the player appears in their sector. They will then react accordingly. Once the threat is gone they will continue mining planets. The AI is setup this way so that if we decide that we want the Lith to be enemies of the Drack we can do this more simply with this configuration.

So far the AI is working with this decision tree which is currently hard-coded into the game but I do have plans to make this data-driven through preloaded text files that will build the decision trees. This way we can have an external editor for the AI in our game. When we want to customize the AI for a single specific ship in our game, we can create an AI in the editor and save it as a data file. Then in our game, we create the starship and load that data file for its AI behavior. Simple.

Every cycle or tick of the game loop, the decision tree is ran and an outcome is determined for that round for each AI. The trees need to be setup with this in mind. Every starship in the game has its own AI tree to run and they should all react slightly differently even though they should have common behaviors based on their classification. So all Drack should be planet miners but during combat, each Drack ship should decide how to tackle their own situation separately.

More on this later…


Remelic

Hybrid Behavior Trees

Pixel Sprite Explosions!

So I’ve been working on the way the sprites explode and I wanted to come up with something different from the usual way its done. Instead of drawing explosion sprites frame at a time or using a fancy particle effect to simulate fire I thought I’d try something different.

The idea is to use the sprites pixels with a little vector math to create an exploding sprite effect. I want to have the pixels force themselves apart from the center outward and eventually fade into darkness. Using the existing particle system I’ve created for this game, I can create a particle “emitter” that starts out looking exactly like sprite we want to explode. Than I’ll set the state of the sprite to dead so it isn’t visible anymore. When we start the particle system, we will use the center of the sprite as our force reference.

Sprite Explode Pixel Grid
32 x 30 Sprite Grid reference for particle system.

Before we setup the particle system, we will need to find the center of our sprite. That is simply done by dividing its width and height in half. This will be the origin of our quadrant system.

The way I setup the particle system is by looping through all the pixels in the sprite array we want to explode. I begin by first checking to see if the pixel we are starting is transparent or not. If it is then I wont start a particle there for obvious reasons.

When we do encounter a pixel we simply set the particle’s ‘x’ and ‘y’ to the position of the pixel and the velocity is dependent on the distance from the center and the quadrant it is in. The velocity will be calculated using vector notation that I wrote about in ‘Tracking or Evading a Point in 2-D‘.

float accel = 1.0f;
float deltaX = particleX - centerX;
float deltaY = particleY - centerY;
float length = (float) Math.sqrt(Math.pow(deltaX, 2)+Math.pow(deltaY, 2));

if(length > 0)
{
    particleXV = (deltaX / length) * accel;
    particleYV = (deltaY / length) * accel;
}

Using the above code will setup the velocity for each particle according to its position from the center point. I might have to tweak the acceleration a bit to get it right but that is basically it.

When all the particles have been setup, it’s simply a matter of starting all of them and letting them fade out proportional to their lifespan. As their lifespan counts down, the alpha value is adjusted accordingly.

int alpha = (int)((lifetime / maxlife) * 255);

At least that is the plan… I admit I haven’t actually tried the vector math on this yet. Currently I have the particle system setup properly but the velocities are just randomized without any guidance. It sorta works but doesn’t quite look right due to the strange feel of the physics. I can send it any sprite I want and It will explode in a random chaotic way.


Remelic

Pixel Sprite Explosions!

Message Dialog Box and Font Work

Most games need to relay information to the player in order to make the game playable and fun. With this Trek game, I want to have two different message systems; one for relaying narratives that the characters are saying between each other, and a second one for receiving the in-ship communications like distress calls, etc.

The sub-space messages that the ship receives will be listed in a box on the side so the player can dismiss them or react to them quickly if necessary. If there is a distress call from a planet that needs evacuating, we should alert the player in some way and make the message clearly visible.

The dialog box is currently working. It pops up a message in the center of the screen and pauses the game in the background. Clicking anywhere on the screen will close the box or display the next lines of text. I will probably have to add icons or something to show that there are more lines to read, etc.

Message Dialog Box

As for the planets in the game, I know have a way of showing the orbit and scan logic to the player. When they are too far away, I can pop-up a dialog box and have a character say, “Captain, the ship is too far away to scan the surface.”

This iteration was basically a test to see if I could get word wrapping to work and it does very well. I can resize the dialog box to any width or height and the code will wrap the text. The next iteration of the dialog box will be to have it resize to the text dynamically, and maybe have icons or character dialog images. I plan on adding lowercase characters and more punctuation characters to complete the font-set.

One part of the game that I would like to complete is the firing of the EMBeam. It is working as far as animation and particle effects but the enemy starship do not take any damage. I’ll probably have that working next before I move on to implementing more functionality.

EMBeam Firing Animation


Remelic

Message Dialog Box and Font Work

Tracking or Evading a Point in 2-D

I don’t think there is a modern game out there that doesn’t have some kind of tracking or evading element in it. Any AI system needs this functionality to help make enemies look and feel realistic. Usually you want the enemy to run after the player or run away from the player if they are too injured, etc.

Lets say you want to have a zombie follow the player in a strait line regardless of the angle between them. If you don’t want to use sin or cos functions you can use vector math to get the job done.

double deltaX = playerX - zombieX;
double deltaY = playerY - zombieY;
double length = Math.sqrt(Math.pow( deltaX, 2 )+Math.pow( deltaY, 2 ));

if(length > 0)
{
    double velocityX = ( deltaX / length ) * accel;
    double velocityY = ( deltaY / length ) * accel;

    zombieX += velocityX;
    zombieY += velocityY;
}

The above code will move a zombie toward the player continuously until the zombie is right on top of the player. If you want to have the zombie move away from the player, you can either use a negative acceleration or minus the velocity from the zombie instead of adding it. However, using a negative acceleration is more appropriate I think.

You can also use the above code to have things follow the mouse cursor or flock toward a point.


Remelic

Tracking or Evading a Point in 2-D